Debian 12 Bookworm
0. Introduction
For production using official Debian 12 packages.
1. Requirements
- A supported Linux server
- A public domain name from a registrar and top level domain you trust.
In order to run an official Aleph.im Compute Resource Node (CRN), you will also need the following resources:
- CPU (2 options):
- Min. 8 cores / 16 threads, 3.0 ghz+ CPU (gaming CPU for fast boot-up of microVMs)
- Min. 12 core / 24 threads, 2.4ghz+ CPU (datacenter CPU for multiple concurrent loads)
- RAM: 64GB
- STORAGE: 1TB (NVMe SSD preferred, datacenter fast HDD possible under conditions, you’ll want a big and fast cache)
- NETWORK: Minimum 500 MB/s symmetrical, dedicated IPv4, and /64 or larger IPv6 subnet.
You will need a public domain name with access to add TXT and wildcard records.
💡 This documentation will use the invalid
vm.example.orgdomain name. Replace it when needed.
2. Installation
Run the following commands as root:
First install the VM-Connector using Docker:
apt update
apt upgrade
apt install -y docker.io apparmor-profiles
docker run -d -p 127.0.0.1:4021:4021/tcp --restart=always --name vm-connector alephim/vm-connector:alpha
Then install the VM-Supervisor using the official Debian 12 package. The procedure is similar for updates.
# Download the latest release
release=$(curl -s https://api.github.com/repos/aleph-im/aleph-vm/releases/latest | awk -F'"' '/"tag_name":/ {print $4}')
sudo wget -P /opt/ https://github.com/aleph-im/aleph-vm/releases/download/${release}/aleph-vm.debian-12.deb
# Install it
apt install /opt/aleph-vm.debian-12.deb
Reboot if required (new kernel, ...).
3. Configuration
Update the configuration in /etc/aleph-vm/supervisor.env using your favourite editor.
Hostname
You will want to insert your domain name in the form of:
Network configuration
IPv6 address pool
The range of IPv6 addresses usable by the virtual machines must be specified manually. This is required to enable IPv6 egress.
According to the IPv6 specifications, a system is expected to receive an IPv6 with a /64 mask and all addresses inside that mask should simply be routed to the host.
The option takes the form of:
Assuming hosting provider follows the specification, the procedure is the following:
- Obtain the IPv6 address of your node, the one used by the ALEPH_VM_NETWORK_INTERFACE setting below. You can find it
via the
ip acommand. - Remove the trailing number after
::if present, for example2a01:4f8:171:787::2/64becomes2a01:4f8:171:787::/64. - Add the IPv6 range you obtained under the setting
ALEPH_VM_IPV6_ADDRESS_POOLin the configuration.
Network Interface (optional)
The default network interface is detected automatically from the IP routes. You can configure the default interface manually instead by adding:
(don't forget to replace enp0s1 with the name of your default network interface).
Domain Name Servers (optional)
The DNS server used by the VM are detected automatically and doesn't need to be set manually.
But you can set the DNS resolver used for automatic detection manually by using one of the following options:
💡 You can instead specify the DNS resolvers used by the VMs using
ALEPH_VM_DNS_NAMESERVERS=["1.2.3.4", "5.6.7.8"].
Volumes and partitions
Two directories are used to store data from the network:
/var/lib/aleph/vmcontains all the execution and persistent data./var/cache/aleph/vmcontains data downloaded from the network.
These two directories must be stored on the same partition. That partition must meet the minimum requirements specified for a CRN.
💡 This is required due to the software using hard links to optimize performance and disk usage.
Applying changes
Finally, restart the service:
4. Reverse Proxy
We document how to use Caddy as a reverse proxy since it manages and renews HTTPS certificates automatically.
Any other reverse-proxy (Nginx, HAProxy, Apache2, ...) should do the job as well, just make sure to renew the HTTPS/TLS certificates on time.
First, create a domain name that points to the server on IPv4 (A) and IPv6 (AAAA).
This is a simple configuration. For more options, check CONFIGURE_CADDY.
Again, run these commands as root:
apt install -y debian-keyring debian-archive-keyring apt-transport-https
curl -1sLf 'https://dl.cloudsmith.io/public/caddy/stable/gpg.key' | gpg --dearmor -o /usr/share/keyrings/caddy-stable-archive-keyring.gpg
curl -1sLf 'https://dl.cloudsmith.io/public/caddy/stable/debian.deb.txt' | tee /etc/apt/sources.list.d/caddy-stable.list
apt update
apt install caddy
Then, after replacing the domain vm.example.org with your own, use configure Caddy:
cat >/etc/caddy/Caddyfile <<EOL
{
    https_port 443
}
vm.example.org:443 {
    reverse_proxy http://127.0.0.1:4020 {
        # Forward Host header to the backend
        header_up Host {host}
    }
}
EOL
Finally, restart Caddy to use the new configuration:
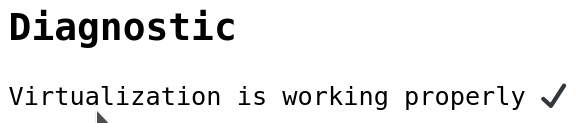
5. Test
Open https://[YOUR DOMAIN] in a web browser, wait for diagnostic to complete and look for
If you face an issue, check the logs of the different services for errors:
VM-Supervisor:
Caddy:
VM-Connector:
IPv6 connectivity can be checked by opening the path /status/check/ipv6 on the CRN's URL after restarting the service.
Common errors
"Network interface eth0 does not exist"
Did you update the configuration file /etc/aleph-vm/supervisor.env with ALEPH_VM_NETWORK_INTERFACE equal to
the default network interface of your server ?
"Aleph Connector unavailable"
Investigate the installation of the VM-Connector using Docker in step 2.